The following guide describes a low-cost DIY solution for growing cacti from seed. We have recently launched a exciting new product that takes all the guesswork out of this process. If you’re interested to learn more check out our Cactus Grow Kit. For the DIY solution, read on.
Germinating (growing) cactus from seeds can seem complicated, but we promise you it’s easy and in this guide, we’re going to show you exactly how. The method described in this guide is commonly known within the cactus community as the “takeaway technique”. There are many methods to germinate cacti, but we have found this one to be the simplest, cheapest, and most successful on a small scale. This technique works for all species of cacti seeds that we have experimented with.
What you’ll need
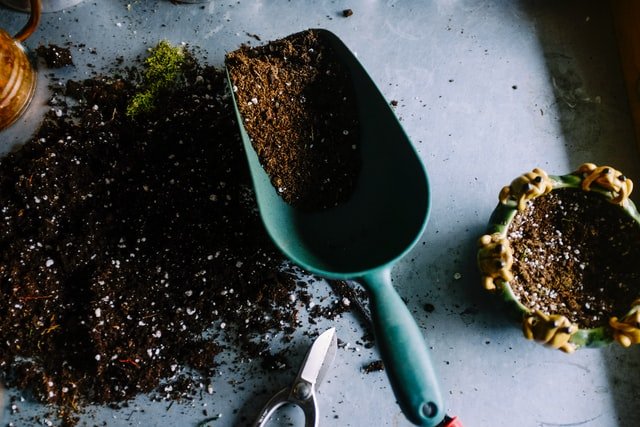
- Potting Soil
- Pumice (1-7mm) or small-grade perlite;
- A sieve or screen if your soil is full of sticks and bark;
- A clear microwave-safe takeaway container like the type you get Chinese food in. If you’re germinating columnar cacti try and find a container that is a bit taller like a 750ml;
- Some bottled drinking water;
- Spray bottle;
- Some cactus seeds – we sell a few different varieties online;
- Patience.
Recommended but not required:
- A microwave;
- A seedling heat mat;
- A T5 grow light.
Prepare your soil mix
If the potting soil you are using is full of sticks and bark we highly recommend you find a way to sieve or screen these out. We use a large metal mesh fire pit cover as our screen, and many people will take apart pedestal fans and use the covers. Large sticks and bark are organic sponges and lead to an increased risk of fungal growth. It’s also best to try and avoid using potting soil that is full of fertilizers as these can be harmful to young seedlings.
Once you have sieved out the junk, the next step is to mix your pumice or perlite into the soil at a ratio of 50/50 soil to pumice/perlite. You will see experienced growers also using things like diatomite, zeolite, scoria, and other minerals in their germination mix with great results. We highly recommend you experiment to find what works best for you. However, if you’re just starting out sticking to this simple 50/50 mix will deliver great results.
Fill your container and add water
Add your mix to the takeaway container until it’s about halfway full. Take your room temperature bottled drinking water (tap water has too much chlorine) and add it to the mix until you reach field capacity. To get a good even coverage you may find it easier to add it to your spray bottle and liberally spray the soil. Field capacity is soil which is fully saturated but with no excess. If you squeeze the soil and water pours out it’s too wet.
Nuke it
Loosely place the lid on the container and chuck it in the microwave for 4 minutes to sterilise the soil mix. Once it’s done take it out, secure the lid firmly and give it an hour or two to cool back down to room temperature before moving on to the next step. Sterilising the soil is not absolutely necessary, but we highly recommend it as commercial soil often contains fungal spores and microscopic insect eggs which can cause problems later on.
Sow the seeds
Once your soil has cooled down (or if you skipped the last step) you’re now ready to sow the seeds. Fill your spray bottle with bottled drinking water, crack open the lid of the container and sprinkle the seeds evenly across the surface. We like to tip the seeds into our palm, pinch them with the other hand and sprinkle them on in rows, but you can find what works for you. The main thing here is to try and evenly disperse them across the surface of the soil. Don’t add too many seeds to a container, 50-80 seeds per standard takeaway container seems to be the sweet spot, and certainly not more than 100. When all the seeds have been sowed give them a few sprays of water to hydrate the seed coat and push them down into the soil. Put the lid back on firmly.
Light & warmth
To germinate the seeds they’re going to need consistent light and warmth. By far the easiest way to achieve this is to put the container on a seedling heat mat underneath a grow light (we use a T5 LED grow light to germinate our seeds). If you don’t have, or don’t want to use a seedling heat mat you will need to wait for late spring or summer to sow your seeds as they simply won’t germinate if the soil is too cold. Likewise, if you don’t have access to a grow light it’s not the end of the world, you can also germinate them on a sunny windowsill or in a bright location outside. If there is any chance of receiving direct sun we recommend wrapping the container in shade cloth, a tea towel or some other kind of fabric to protect them, as direct sun can easily burn delicate young seedlings.
Germination

Assuming the soil is moist, they receive regular & consistent light and the soil is warm enough your cactus seeds will begin to germinate within 7-14 days. Some may pop up earlier if you are using a grow light and heat mat. After a month most of them should be germinated though some may continue to pop up in the following weeks/months.
Congratulations, you’ve germinated cactus seeds! Keep reading for some additional steps on how to care for them after germination.
Just leave them
If you followed our advice and sterilised the soil you can simply leave them in this container for roughly 6 months or until they visibly outgrow the container lid. Try to resist the urge to open the container, as you will simply be introducing unsterilised air and losing humidity.
If you chose not to nuke (microwave) your soil you’re going to have to watch them much more closely, open the container shortly after germination and regularly mist to ensure they don’t dry out. Leaving the container sealed without sterilising the soil will almost definitely lead to fungal growth.
Acclimatising
After roughly 4 months you can begin acclimatising your seedlings to the open air. We do this by removing and replacing the lids, progressively leaving them off for longer periods of time over the course of a week or two. Start with 5 minutes, the next day leave it off for 10 minutes, the next day 15 minutes, the next day half an hour, then an hour, then an hour twice a day, etc, until the lid is completely off. At the beginning you will need to keep a close eye on the soil and mist with bottled drinking water if it ever looks too dry. But after the lid is off you can switch to letting the soil dry out a little between waterings.
Repotting
The right time to repot your cactus seedlings is largely dependent on how quickly they grow, but we usually do ours after 6-8 months. We repot them into small pots either on their own or in small groups if their roots are intertwined and we don’t want to risk ripping them. From there we pop them into our greenhouse for the first 2-3 years of their life.


